Getting Started
To set up your Custom HTTP:
Step 1. Create the Custom Event
Step 2. Customize your HTTP payload
Step 3. Add the event trigger
If this is your first time configuring events, please read About Events.
Step 1. Create the Custom Event
You can create as many custom events as you want. Remember that they have to be of event type: Item Snapshot. If the event has already been created, skip to Step 2.
- Log in to your enterprise web portal (e.g., example.zyllem.com)
- Go to Settings > Events
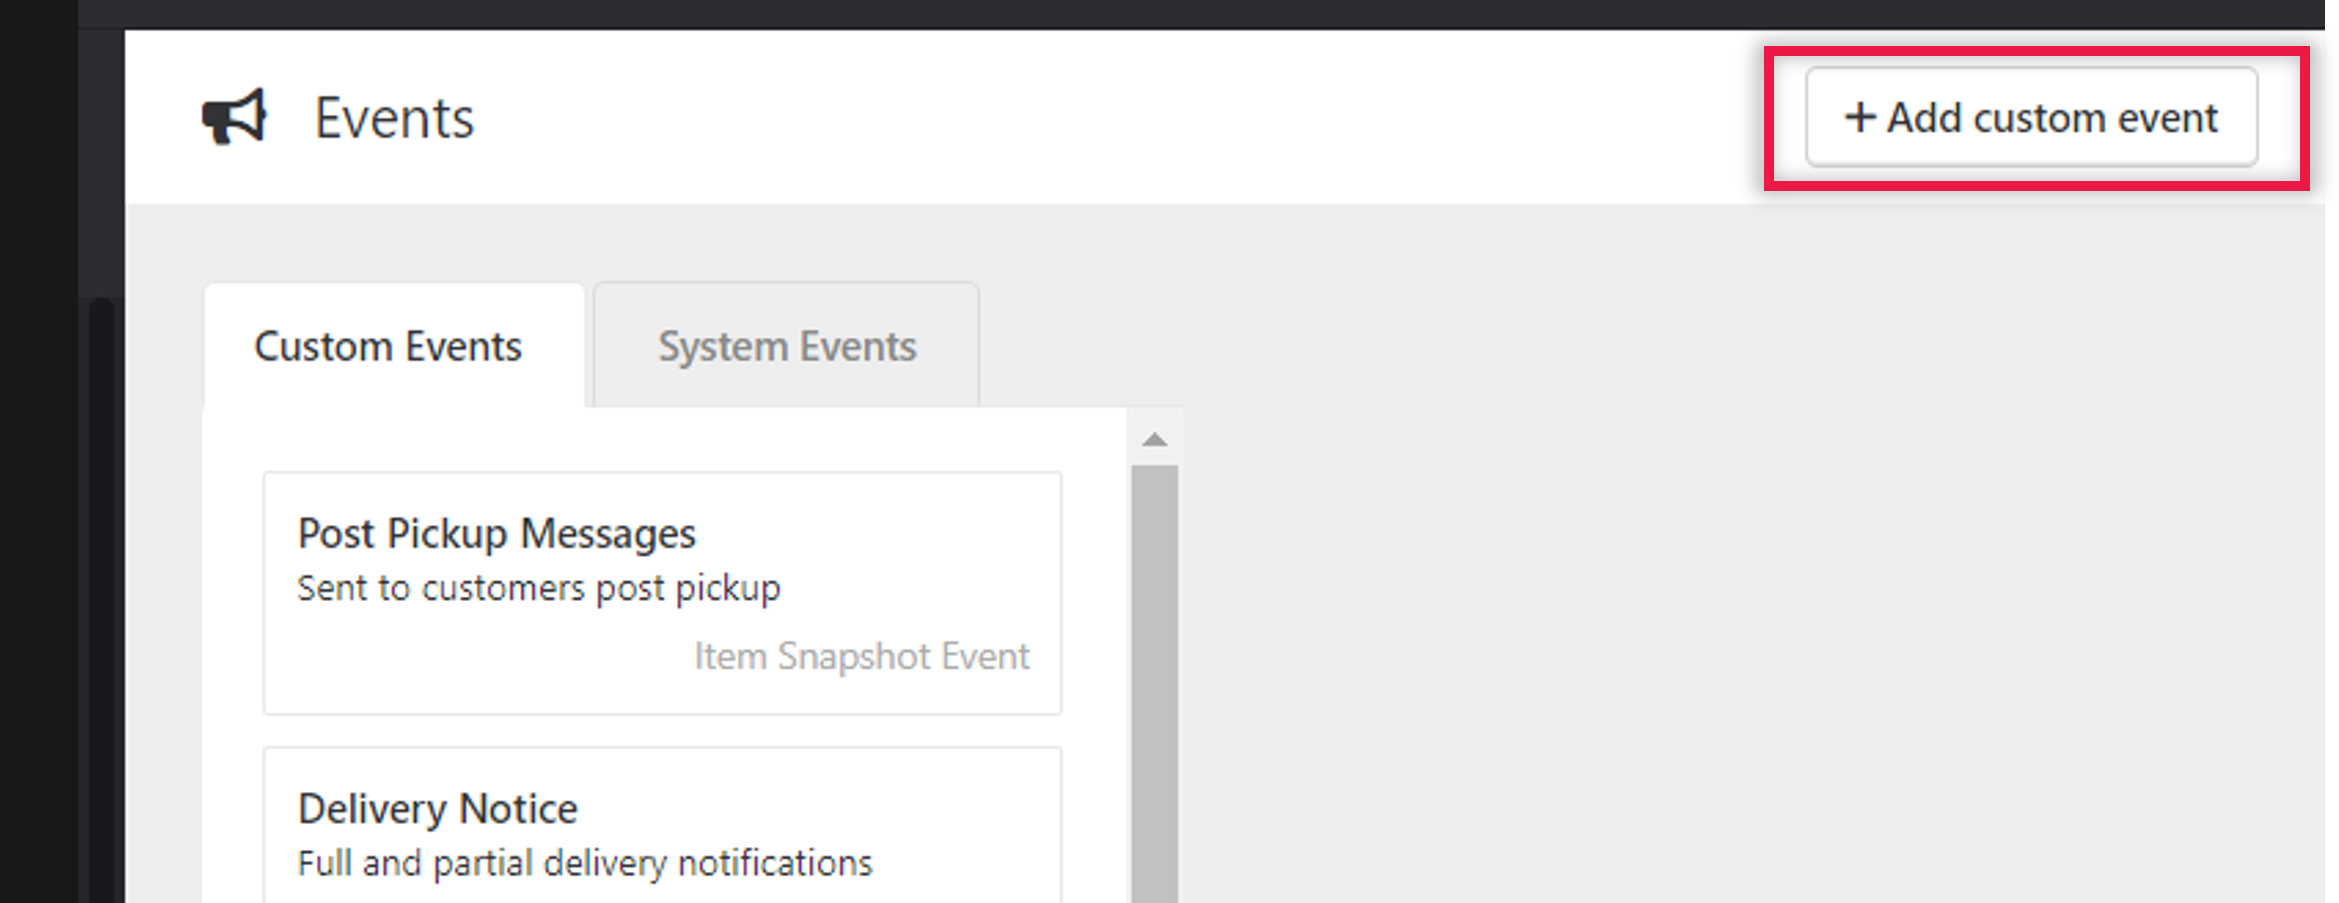
- Click Custom Events tab and then + Add custom event
- Fill in the form (*required)

| Field | Description |
|---|---|
| Name | Name of your event |
| Description | Optional description of your event |
| Event Type | Select Item Snapshot Event. Note that other events are not supported |
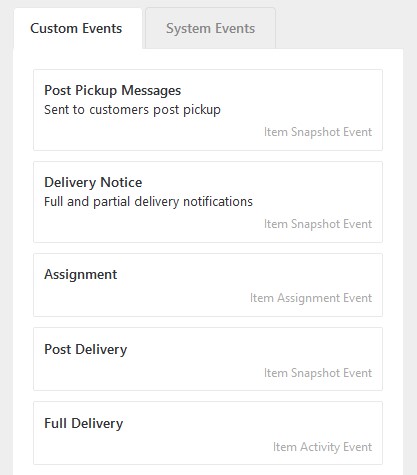
- Click Save. You should see your newly created event on under Custom Events tab.
Step 2. Customize your HTTP payload
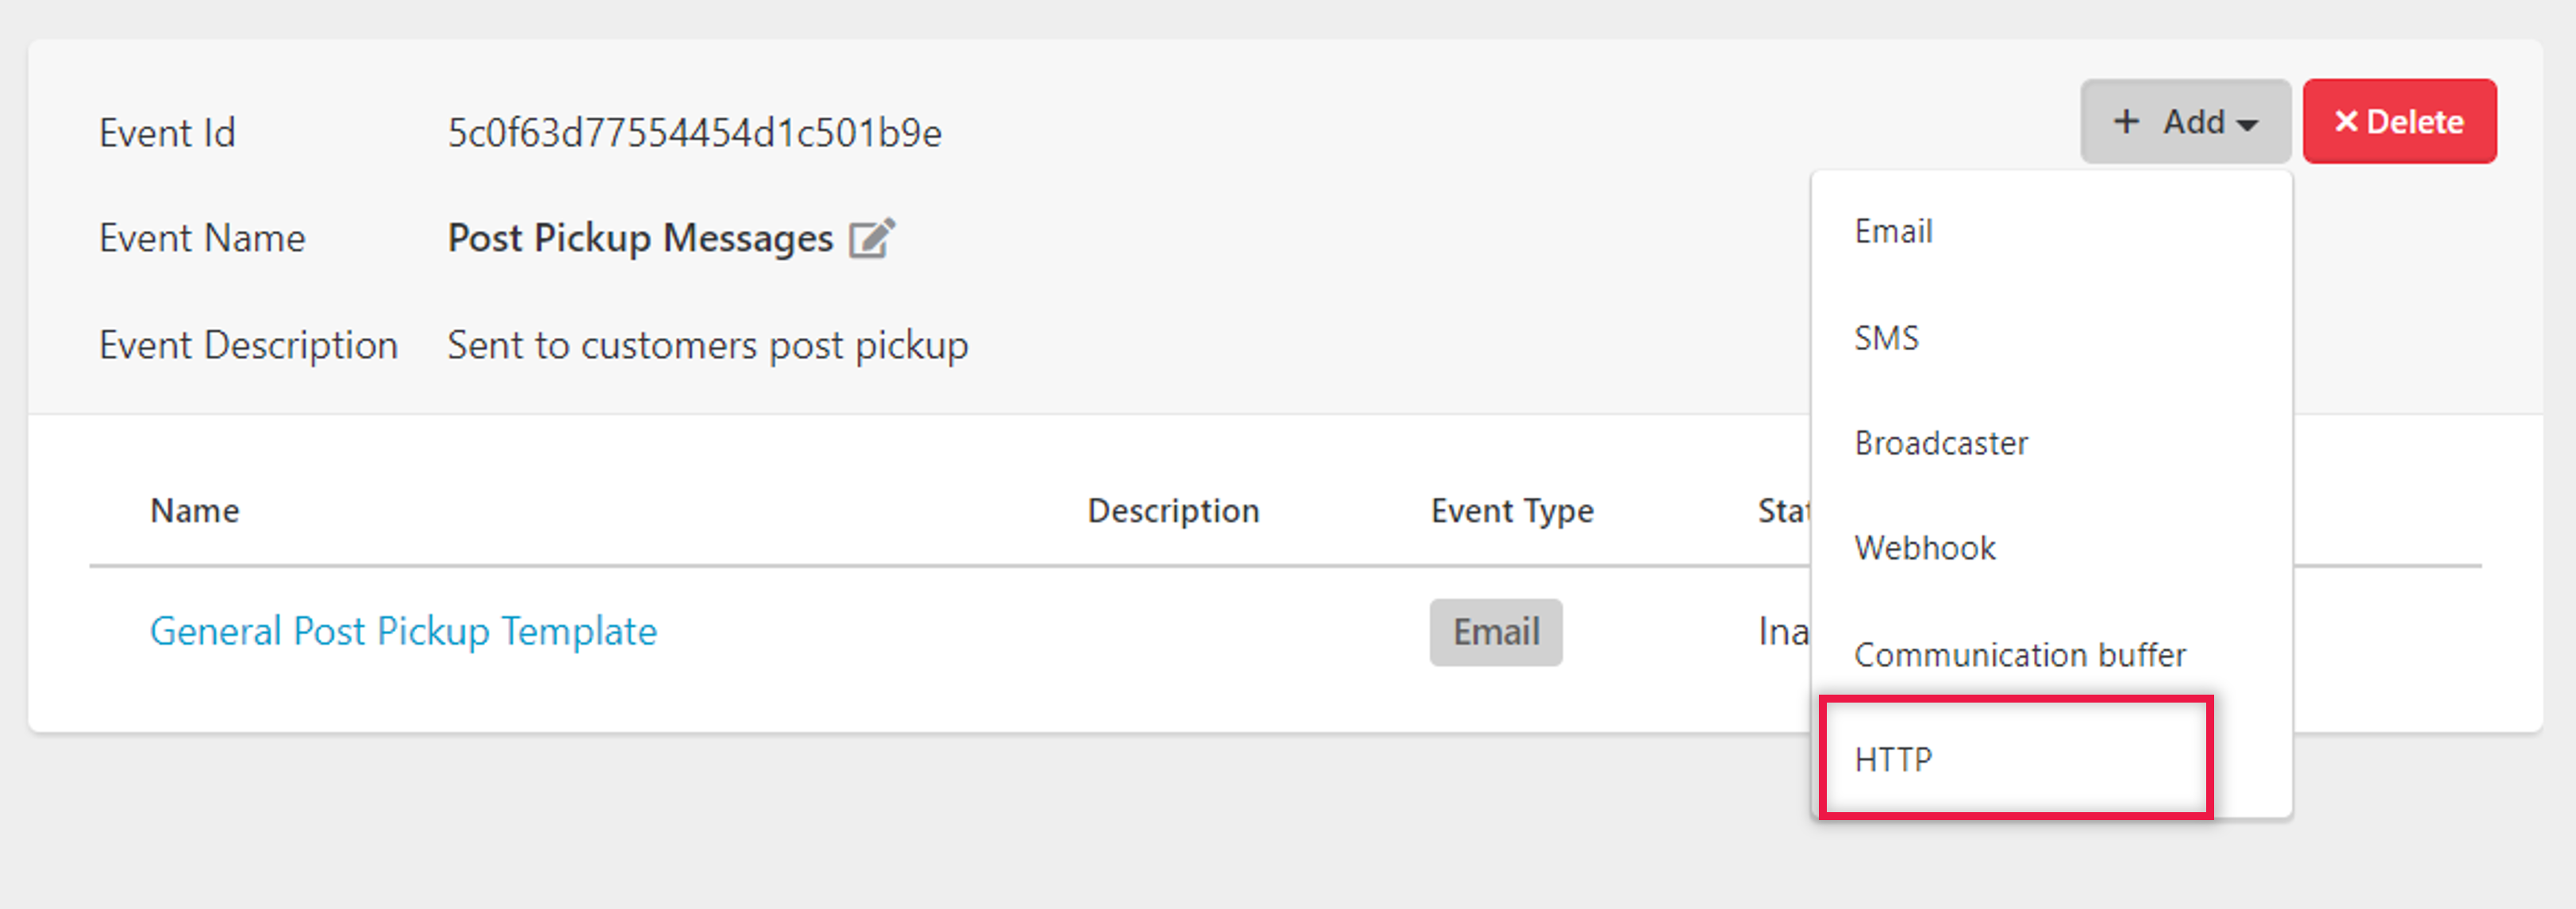
- Click on the custom event you have created in Step 1.
- Click + Add and then HTTP
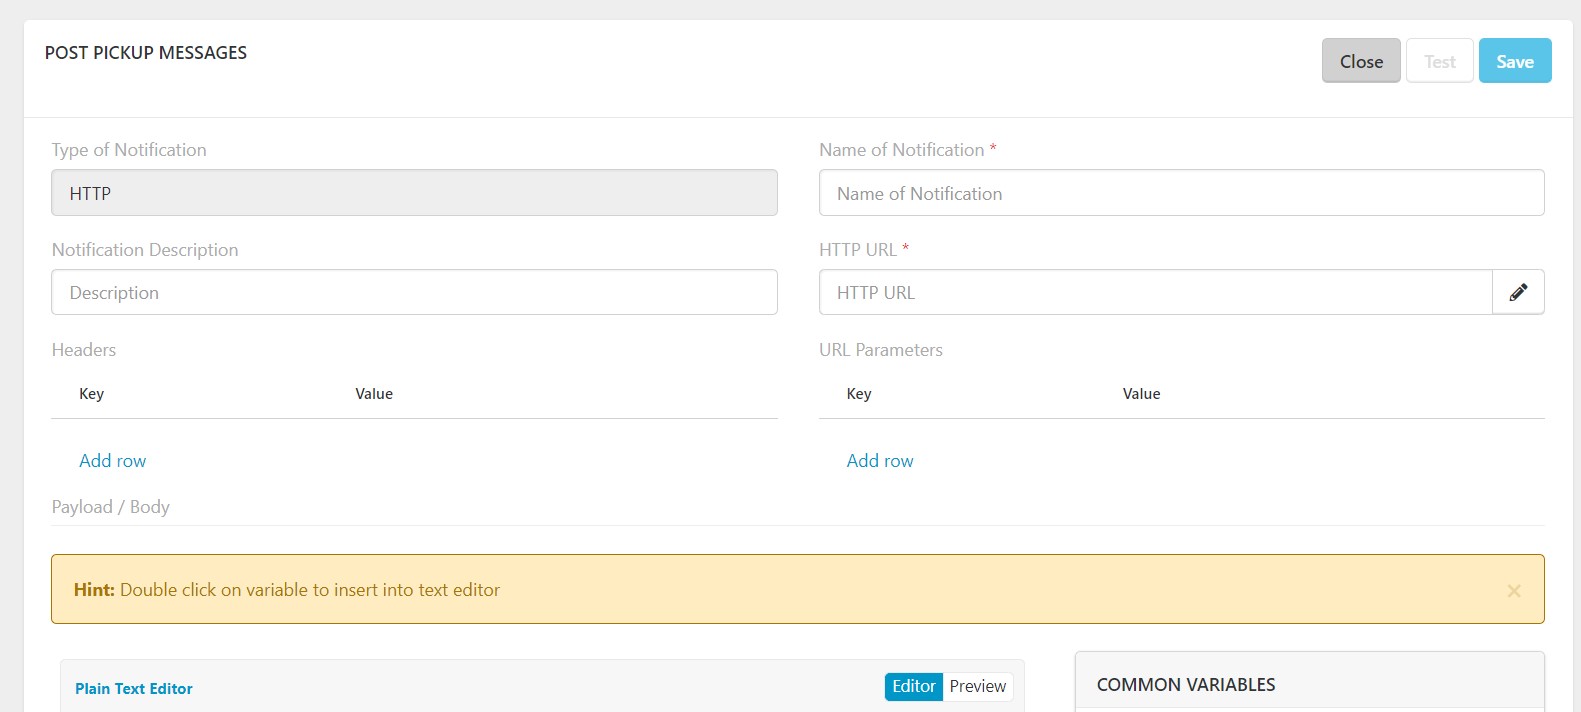
- Fill in the form (*required)
| Field | Description |
|---|---|
| Name of Notification* | The name of webhook activity |
| Notification Description | Optional description of notification |
| HTTP URL | Your client endpoint. Tip: You can insert a variable here, except for variables that consist of URLs such as the Tracking URL |
| Headers | If your endpoint requires authentication (e.g., username, password), click Add row to add the key and value. |
| URL Parameters | If your endpoint requires other parameters, click Add row to add the key and value. |
| Plain Text Editor | This is where you customize your payload. See below for tips |
Inserting variables in your payload
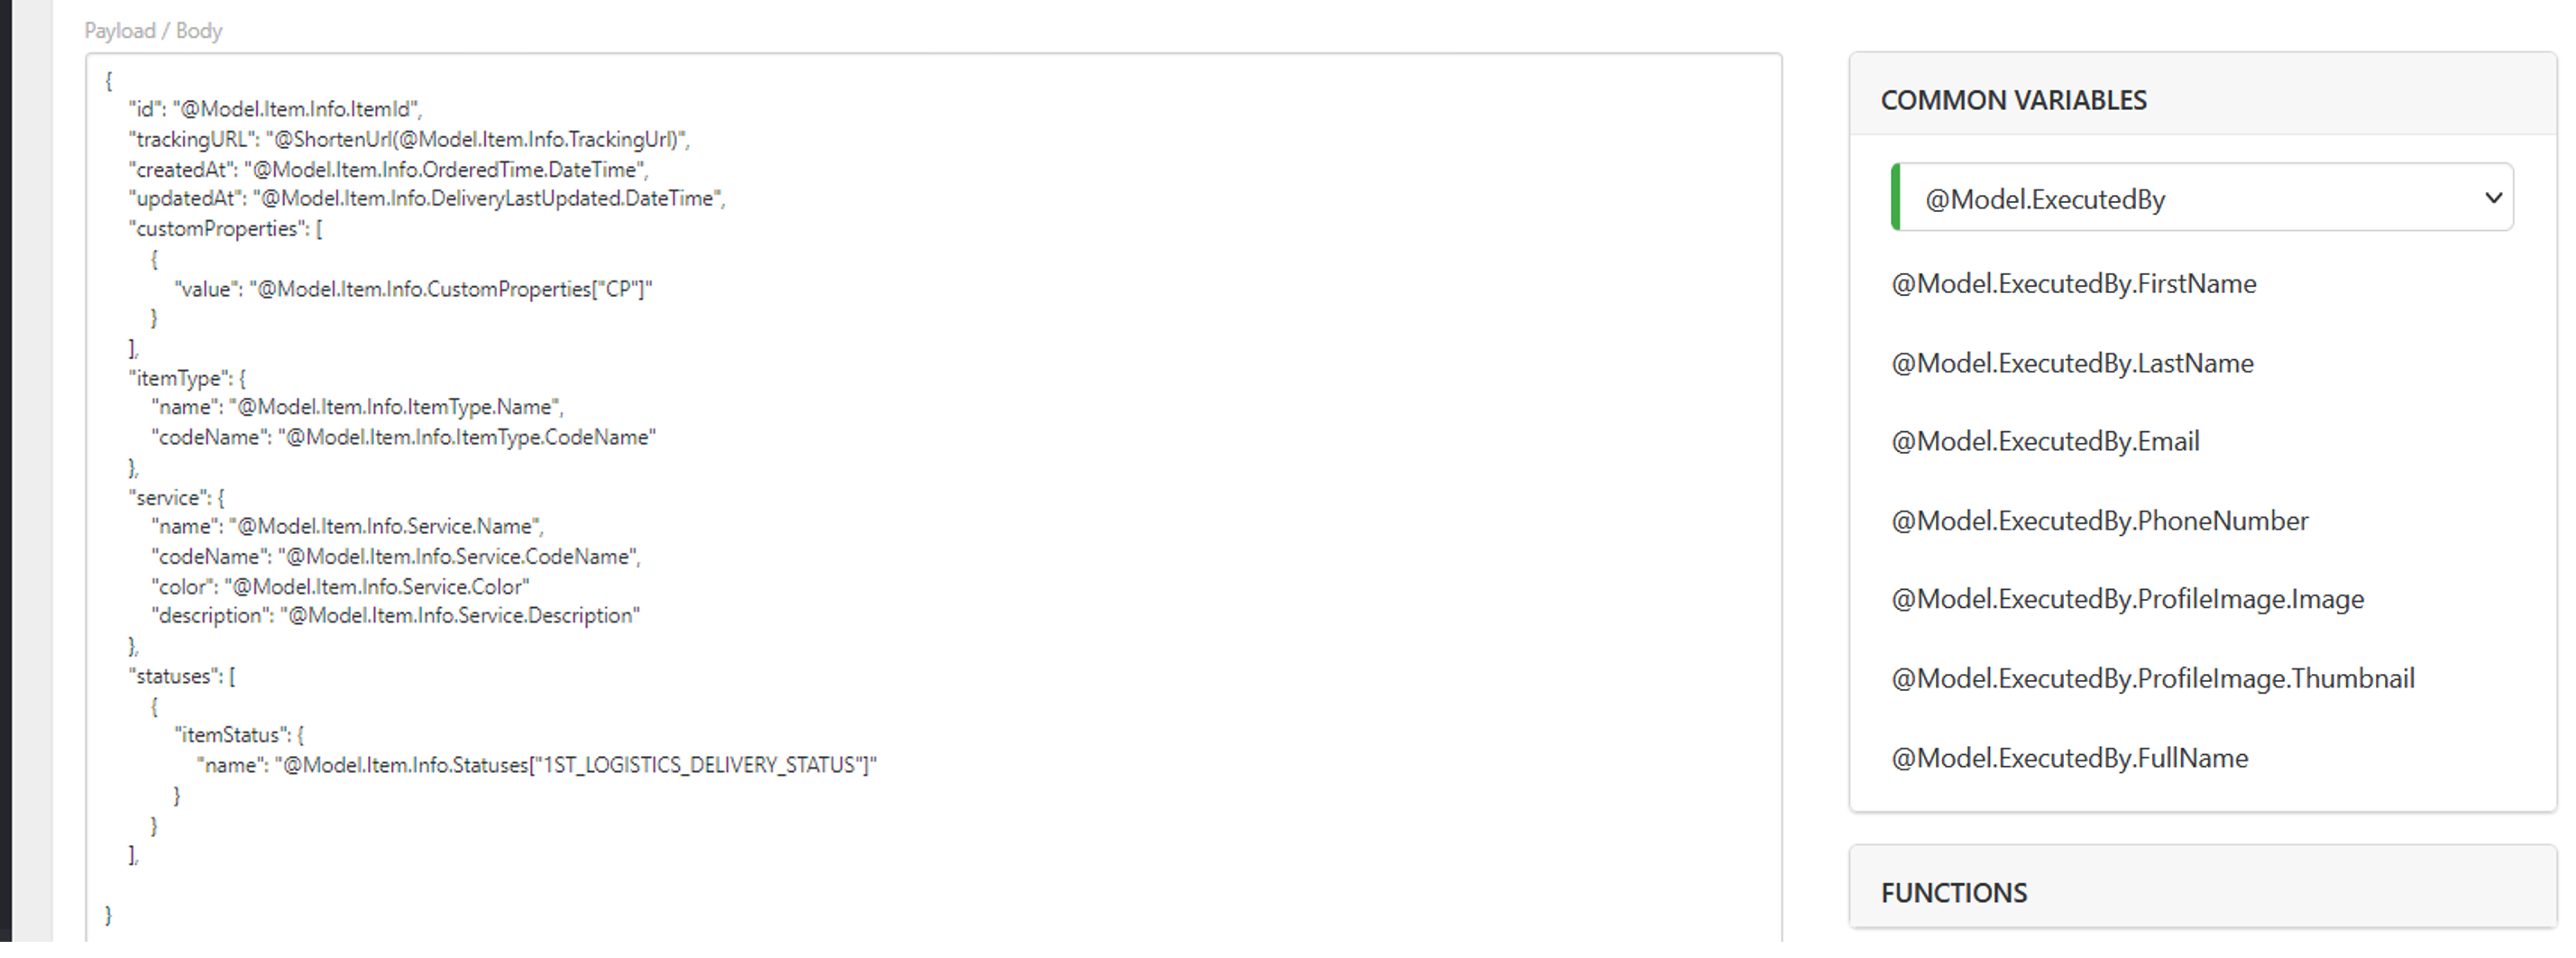
You can insert a range of data variables associated to the item such as custom properties, contacts, users and addresses and so on. See full list of variables and their description.
To insert a variable, under COMMON VARIABLES, double click on the variable name while on edit mode. This will automatically copy-paste it into the editor. Below is an example of a payload:
- Click Save, then Test to test your HTTP call (recommended).

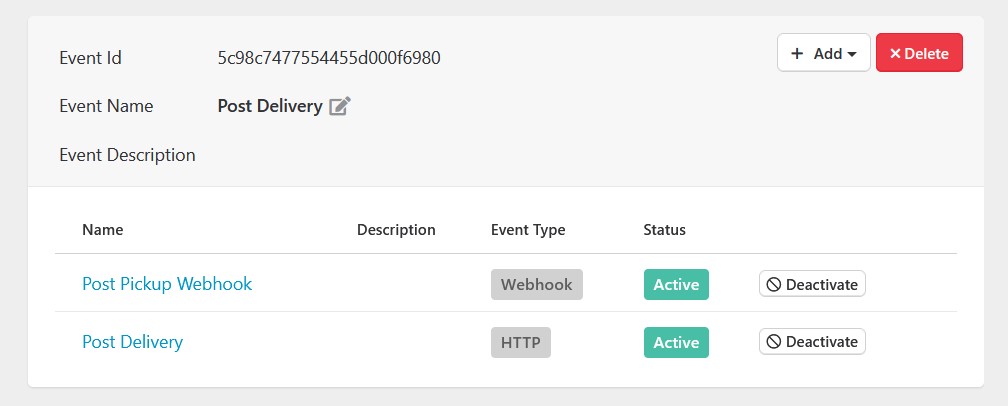
- When you're all set, click Save. You should see your newly created HTTP event in the list.
Step 3. Add the event trigger
- Open your Bridge. Or see the step-by-step guide for adding Triggers.
- Go to the point in the Bridge where you wish to add the trigger and click + Add Trigger.

- Trigger Type, select Fire Event and click Next.
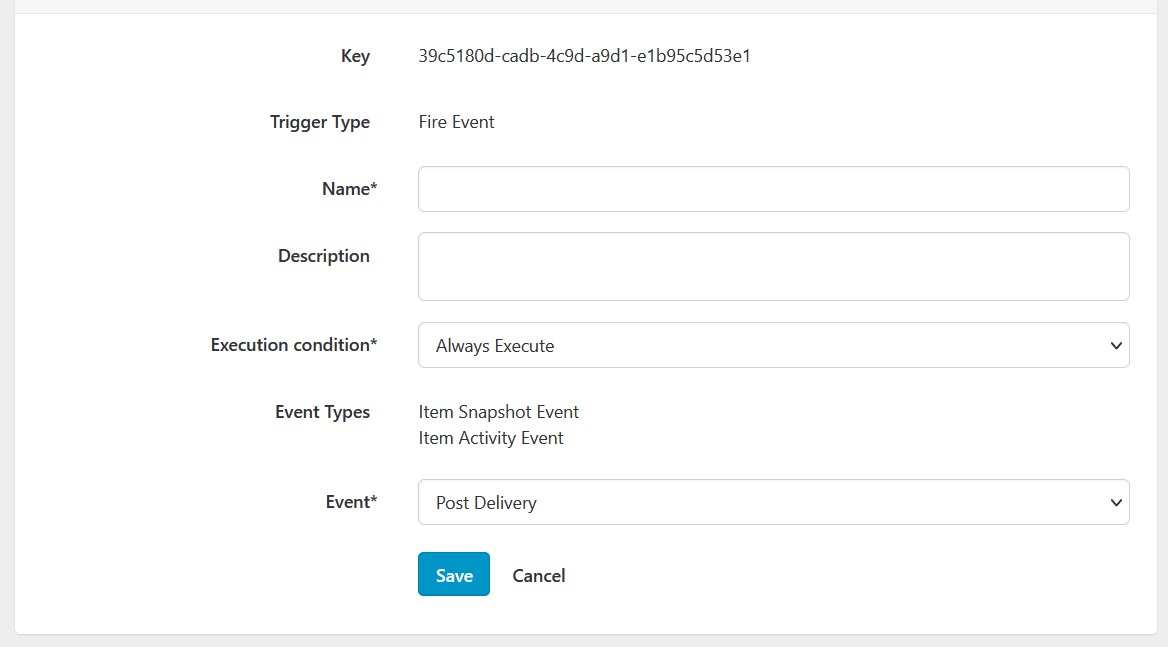
- Fill in the form (*required)
| Name | Description |
|---|---|
| Name* | Name of the trigger |
| Description | Optional description for the trigger |
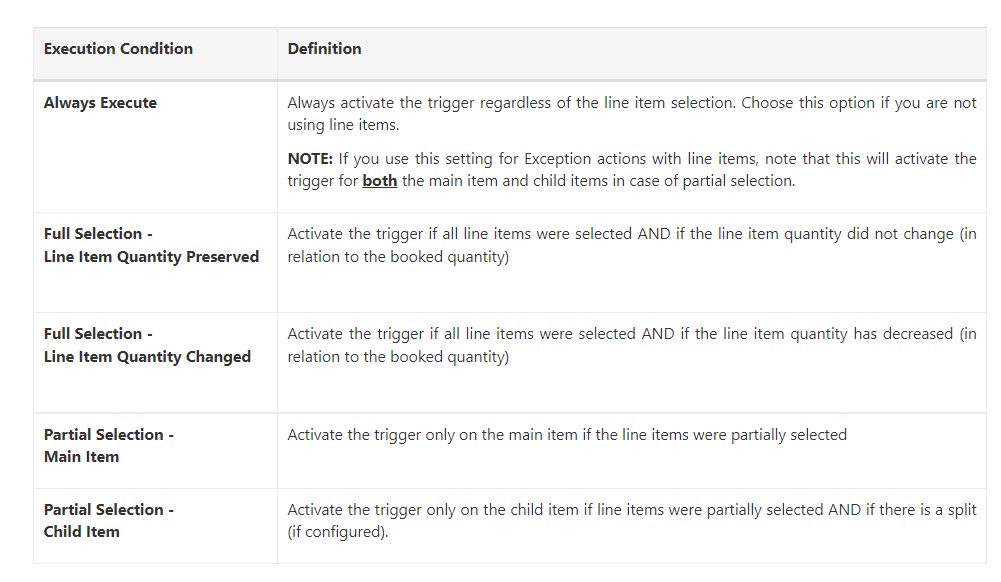
| Execution condition | See table below |
| Event | Select the event you have created in Step 1. |
For the Event condition field, refer to the table below:
- Click Save.
- Publish your Bridge by clicking on Meta Data tab and then Publish.
Updated about 3 years ago
