How it Works
Zyllem's booking process is simple. Once you upload a file to the designated SFTP folder, Zyllem grabs the file and processes the booking. No further action is required unless an error is found in your file.
If you are using an application such as an order management system, you can configure your system to automatically push the files to the designated SFTP folder. Once the orders are booked, you can view them in the Items page of your enterprise web portal.
If you wish to understand the technical details behind the booking process, this section describes the flow of the file as soon as it enters Zyllem's booking engine.
Zyllem's Booking Engine
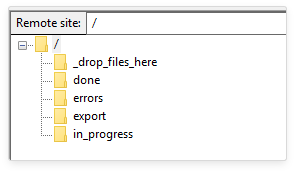
Zyllem's booking engine consists of five folders. You will see these folders when you access your SFTP account.

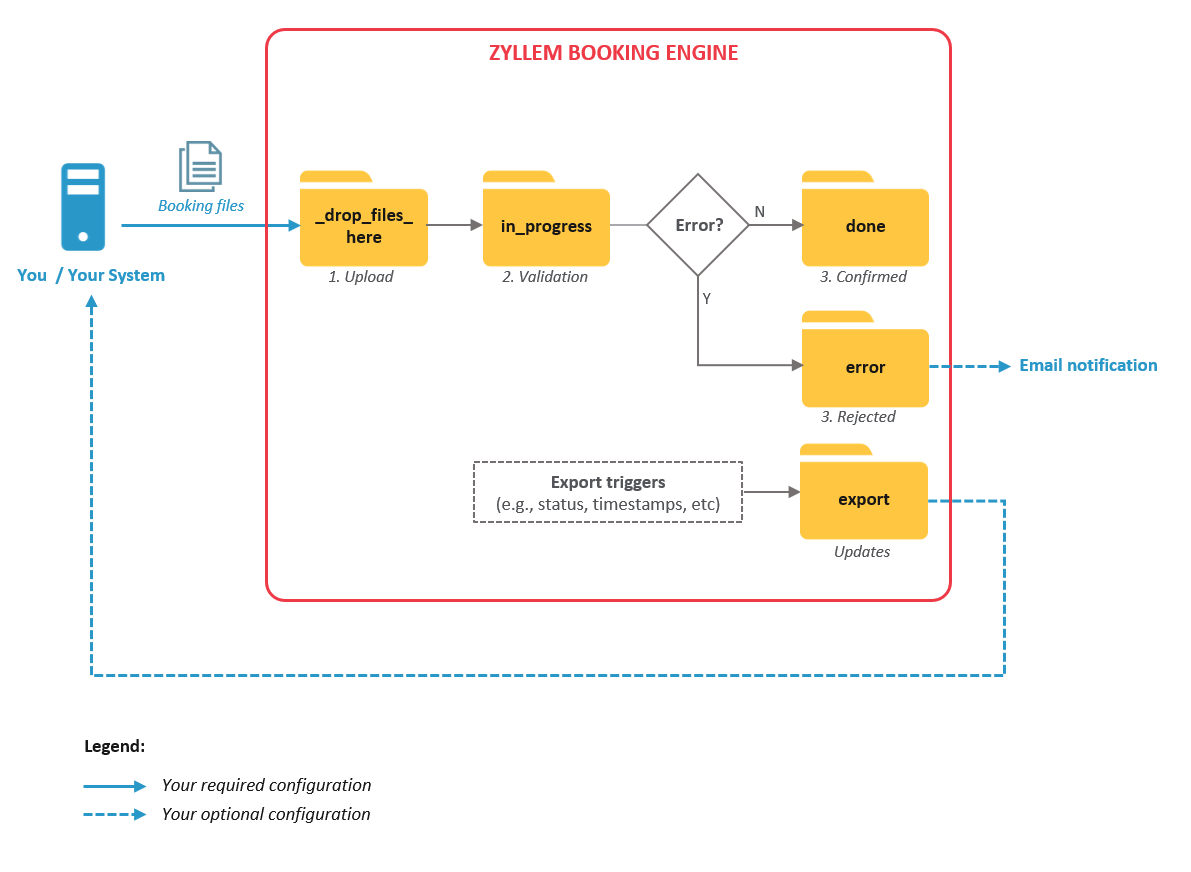
Each folder plays a role in the booking process. Let's say you have a file that contains 100 delivery orders. To book all 100 orders, you simply need to upload the file into the designated booking folder called _drop_files_here. Once the booking is done, the file is converted to CSV format and saved into the done folder.
Below is a diagram of this process:

Zyllem's booking process
Here's a breakdown of this process:
| Step | Folder | Processes | Permission |
|---|---|---|---|
| 1.Upload | _drop_files_here | You (your system) uploads the files to this folder | R/W/D |
| 2.Validate | in_progress | Zyllem grabs the file and moves it to this folder to validate the data | R |
| 3.Book | done | If no errors are found, Zyllem books the orders and moves the file to this folder (happy path) | R/D |
| errors | If errors are found, Zyllem rejects the entire file and moves it to this folder | R/D | |
| 4.Export | export | If configured, Zyllem exports the status and other data into this folder | R/D |
R = Read, W=Write, D=Delete
Exporting data
You can define triggers in your network that will export data into this folder. The data will be saved in CSV format. Contact your administrator to know more about export configuration. Also see: SFTP export settings.
Did you know?
This same booking engine is used by the Bulk Order wizard. A good way to test if your booking file will succeed via SFTP is to first upload it via Bulk Order. If the file gets past Step 3, your file is good to go!
Chronicles Page
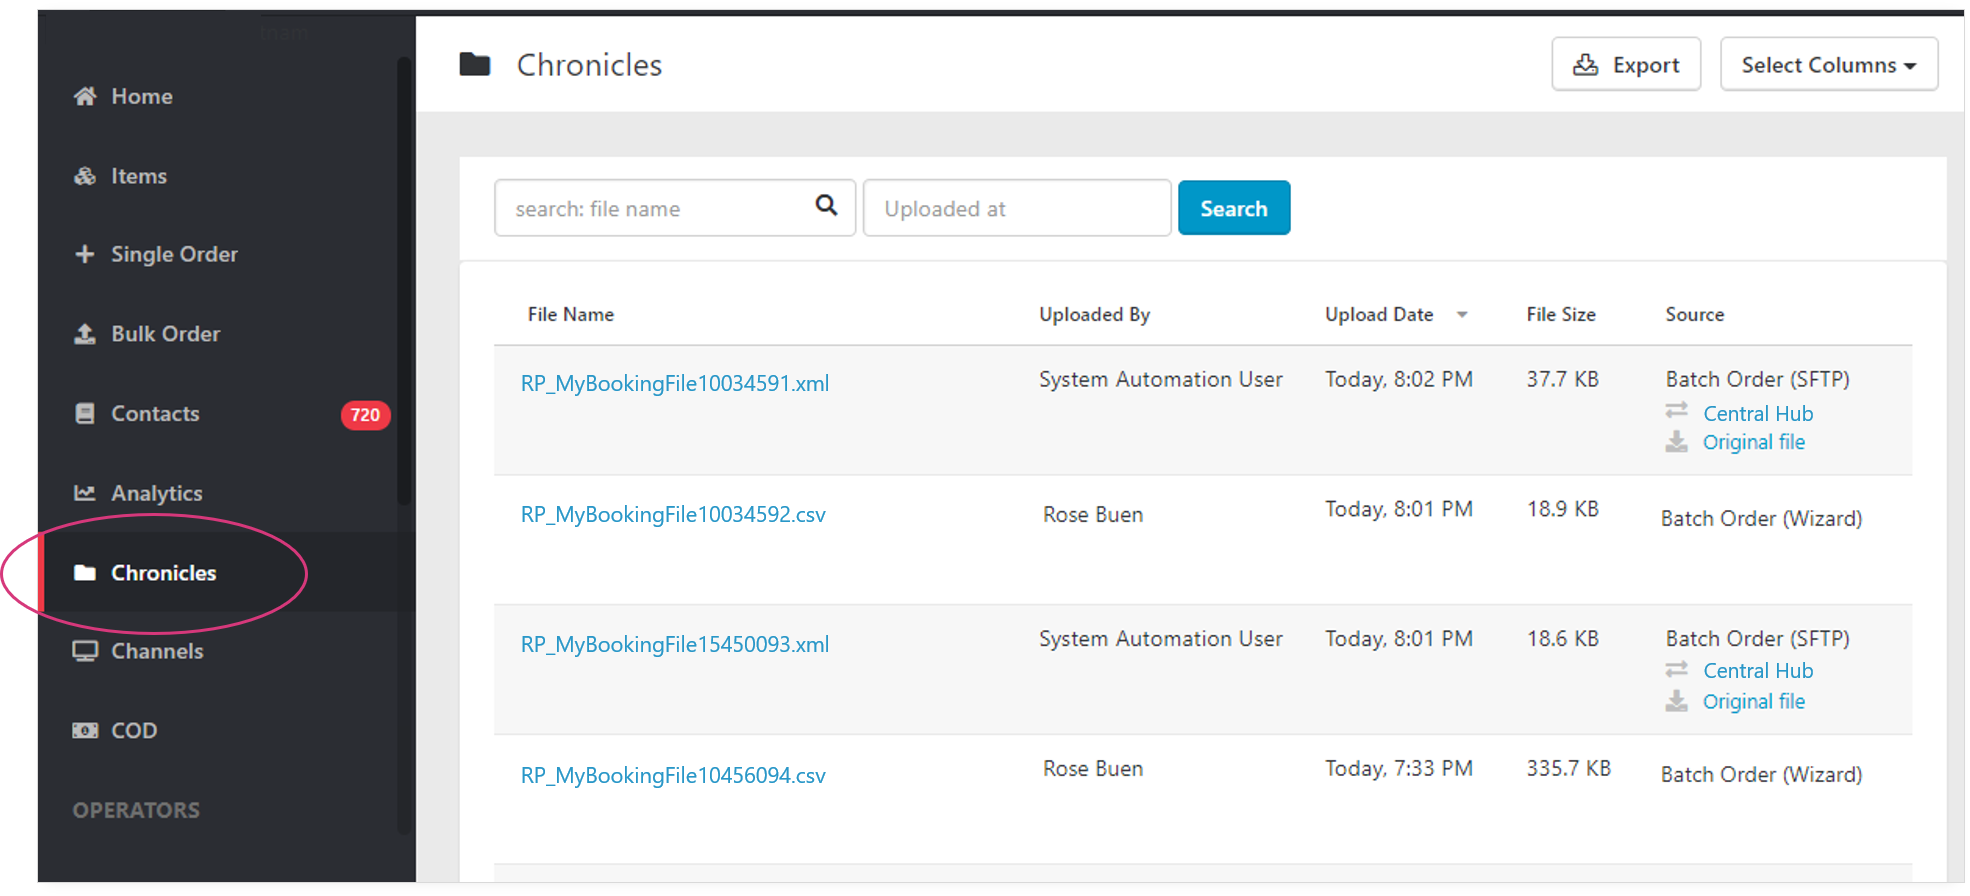
Aside from the Recent Activity logs in your SFTP Settings, you can also check the upload history through the Chronicles page. To access this page, log in to your enterprise web portal and click on Chronicles on the left menu panel.
There are two things to note about this page:
(1) It logs all booking attempts that were uploaded via Bulk Order and SFTP. The Source column indicates the source of the file (i.e., SFTP or Bulk Order wizard).
(2) Unlike the Recent Activity logs, this page does not tell you which files were successfully booked and which ones were rejected or discarded.

Snapshot of the Chronicles page
Unlike the Recent Activity logs, the Chronicles page does not indicate the status of the file (i.e., successful or rejected).
Network Groups
SFTP accounts are set up per Network Group, in the same way that orders must be booked through a Network Group. That is, if you have 3 Network Groups and would like to enable SFTP booking for all groups, you will need to configure and connect to all 3 SFTP clients.

Updated over 6 years ago
