Legacy Webhooks
Zyllem's legacy webhooks (aka manual webhooks) allow you to receive real-time updates from Zyllem, based on 3 types of events that occur in your enterprise. An important thing to note about legacy webhooks is that they require configuration through the web portal.
Legacy webhooks support the following events:
| Event Type | Description |
|---|---|
| Item Assignment | Occurs when an item is assigned, reassigned, or unassigned. Trigger point: First step of the segment |
| Item Snapshot | Any point in the segment where the system takes a "snapshot" of the item and captures the details surrounding it. Can be used to capture the 'current state' of an item. Trigger point: Any node, transition, or action |
| Item Activity | Occurs when an action is performed by a user (e.g., driver clicks on 'Deliver' button). Trigger point: Any action |
Before you proceed...
Please note that legacy webhooks require Bridge configuration and only supports 3 types of events. Before you proceed, consider using the latest webhooks instead. It is easy to set up and provides a complete set of events that you can subscribe to.
There are 4 steps to setting up legacy webhooks:
1. Prepare your Endpoint
Create a webhook endpoint URL on your server for receiving events. If you don’t have an existing server to test with, there are multiple free and paid tools online to set up a test webhook endpoint.
2. Configure the Event
In this step, you will create the events that trigger the webhook activity (e.g., when a delivery is completed, etc.)
To configure an event:
- Log in to your enterprise portal (e.g., example.zyllem.com). Don't have an account? Please contact your enterprise admin.
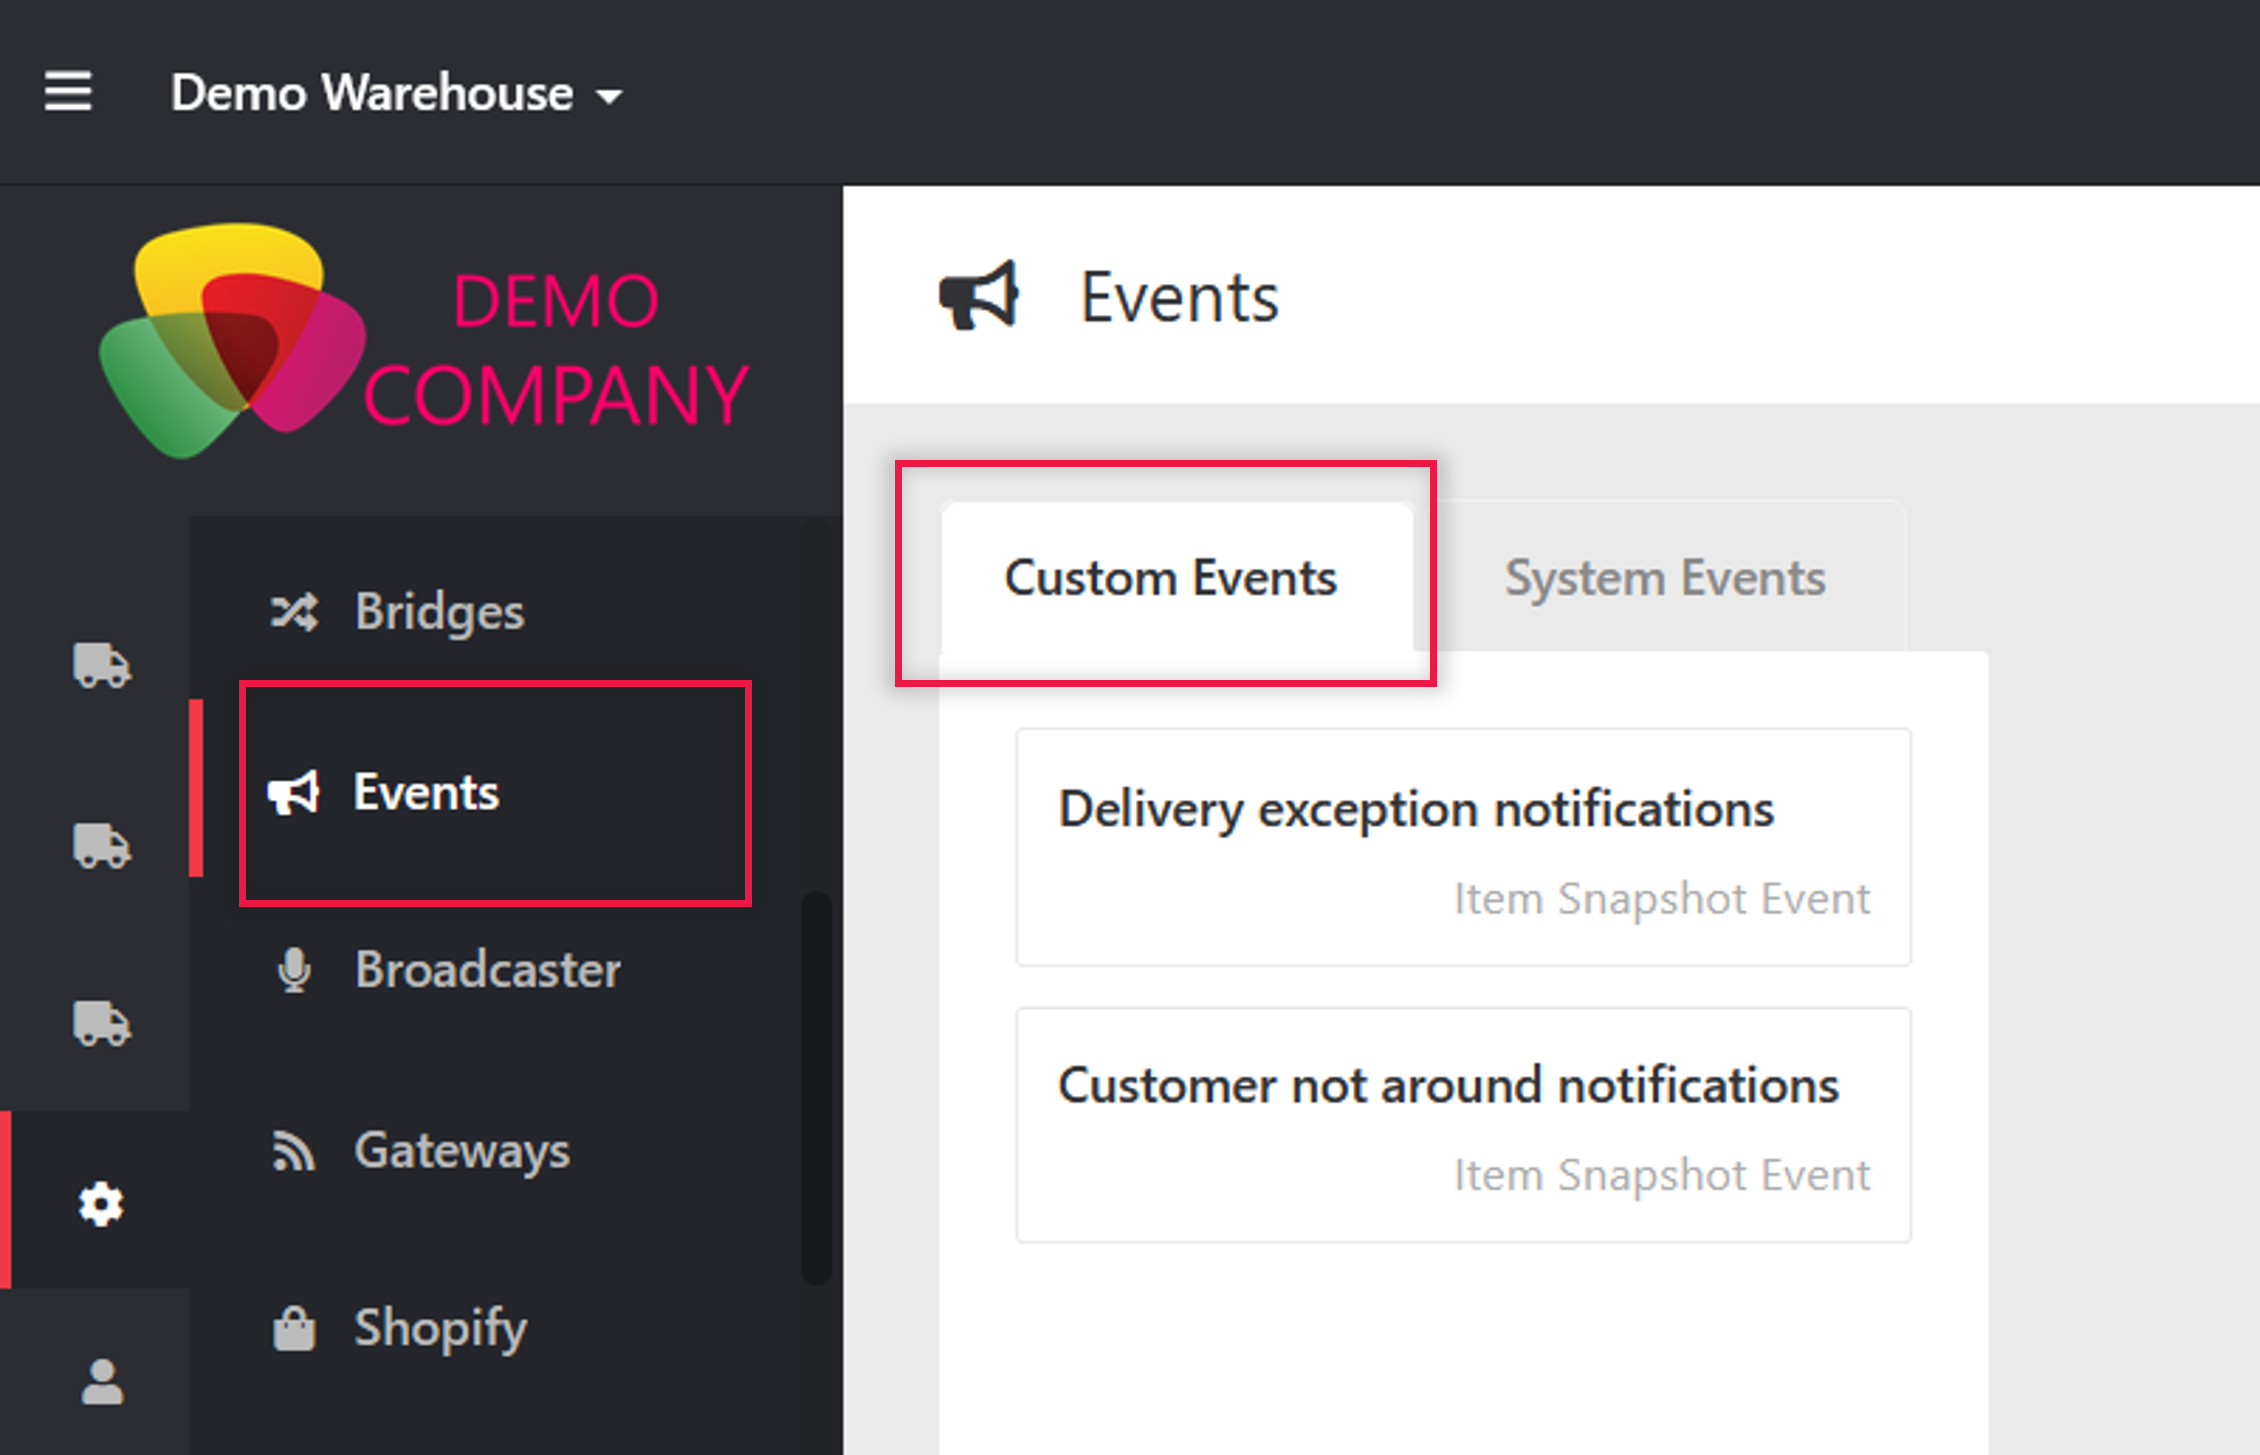
- Go to Settings > Events.
- Click on *Custom Events tab.

- Click Add Custom Event.

- Fill in the form (*required):
| Field | Description |
|---|---|
| Name* | Name of event. |
| Description | Description of the event. |
| Event Type* | Select the event type. Learn more about the event types. |
- Click Save.
- The event details will be displayed. Click + Add and select Webhook.

- The webhook form will be displayed. Fill in the form (*required)
| Field | Description |
|---|---|
| Name of Notification* | The name of the webhook activity |
| Notification Description | Description of webhook activity |
| Webhook URL* | Enter the endpoint you created in Step 1 |
| Headers | If your endpoint requires authentication (e.g., username, password), click Add row to add the key and value. |
| URL Parameters | If your endpoint requires other parameters, click Add row to add the key and value. |
- Click Save.
- On the same page, test your endpoint locally by clicking on Test.

Below is a sample response of a successful test:
{
  "id": "192a335c0000000000000000",
  "reference": "XKCD399",
  "trackingId": "1234-5678-abcd",
  "customProperties": [
    {
      "type": "ID",
      "name": "Custom Id",
      "codeName": "CUSTOM_ID",
      "value": "xyz-321-873n3"
    }
  ],
  "eta": {
    "from": "2019-03-25T18:04:54.87+08:00",
    "to": "2019-03-25T20:04:54.87+08:00"
  },
  "target": {
    "id": "192a335c0000000000000000",
    "externalId": "ctc-1234-b42",
    "company": "Zyllem pte ltd",
    "name": "John Smith",
    "phone": "+655555555",
    "email": "[email protected]",
   .....
3. Configure the Trigger
Once you have created the events, you need to configure the triggers that will fire the said events. This is done through the Bridge.
To add a webhook trigger:
- Open your Bridge. Or see the step-by-step guide for adding Triggers.
- Go to the point in the Bridge where you wish to add the trigger and click + Add Trigger.

- Trigger Type, select Fire Event and click Next.
- Fill in the form (*required)
| Field | Description |
|---|---|
| Name* | Name of trigger |
| Description | Description of event |
| Event* | Select the event you have created in Step 2. Don't see the event? Make sure you are at the right trigger point. |
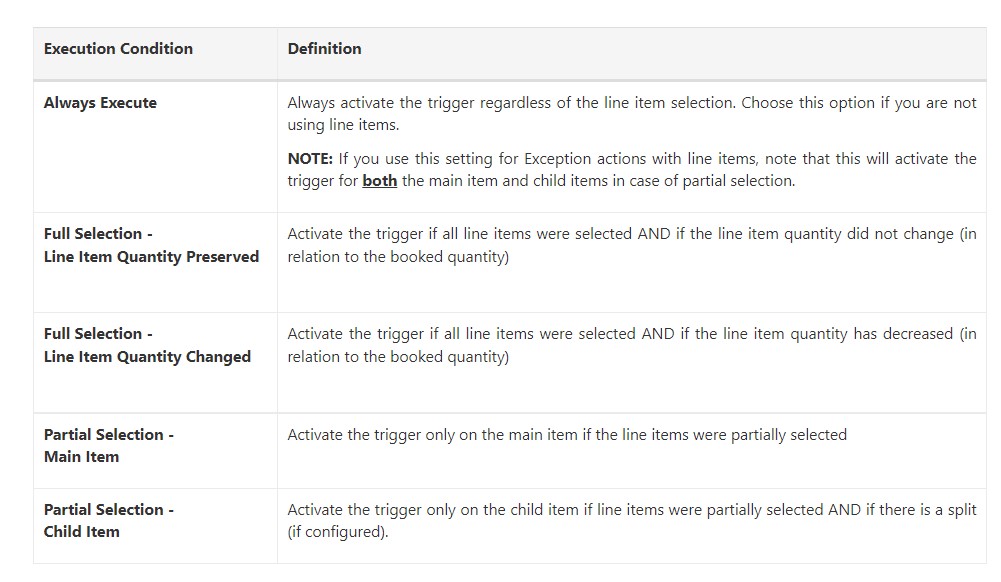
For the Execution condition field, refer to the table below:

- Click Save.
- Publish your Bridge by clicking on Meta Data tab and then Publish.
4. Test Your Webhook
Now that you have configured the webhook event and trigger, you can now test your webhook events by performing the actual event.
To test your webhook:
- Book an item (or contact your Enterprise admin to facilitate the booking).
- Using the Zyllem app or web portal, execute the steps that will trigger the webhook events you configured in the Bridge (Step 3).
- To view the response schema, see Legacy Webhooks Reference
Updated about 3 years ago
